Setting up
Current setup guidance
Claude updates faster than any guide, so your pack tells you what to look for and this page tells you what it is called today.
We keep this page regularly updated with all the key information you need to get set up with Claude so you can start building your AI team.
Last checked: 1 September 2026
Which model to use
Select the latest Opus model.
The model is the underlying engine that powers Claude. There are different versions available that have been released over time: Opus, Fable, Sonnet and Haiku.
Each model uses a different number of tokens (the units of what is required to process the things you do in Claude) and you have token usage limits within your Claude subscription. Fable uses the most, by far, because it is the most advanced.
We recommend only running on Opus until you get more confident with Claude and then you may want to try different models for different jobs.
Where to set things up
Your kit guides you through the setup stages step by step.
The biggest hurdle is downloading your package (a zip file containing the folders and documents you need), putting it in a folder on your computer that Claude can see (the general Documents folder usually works) and starting your first session.
On the Claude desktop app you see a screen similar to the one below.
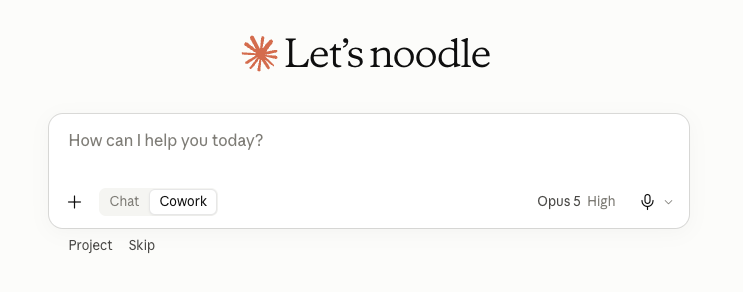
Good news - you're in, then:
- Select 'Cowork'
- Click Project, then 'Add a folder'

Fig 2Click Project and this menu opens. Choose 'Add a folder'. - Go to where you have put 'Build My AI Team', select it, then click 'Open'
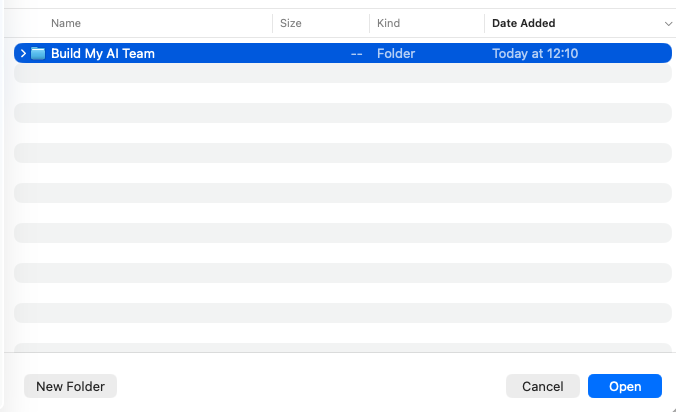
Fig 3Find your 'Build My AI Team' folder, select it and click 'Open'. - If it asks you for permission to change files, select 'Always Allow'. This means that Claude can only access the Build My AI Team folder, so it can read everything it needs to run properly, it can edit and create new files
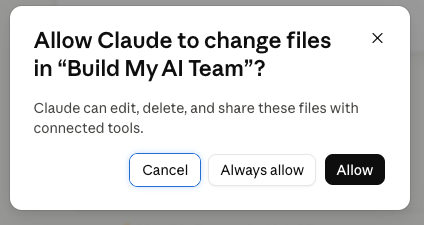
Fig 4The permission ask. 'Always allow' covers this one folder only. Note - we only work within this single folder while you are building your AI team. This keeps things separate and controlled, away from other folders on your computer. You will see new files get added into the Build My AI Team folder as you start working with Claude, building your team, doing real work to produce things for your business and completing the progress milestones.
- When you see your 'Build My AI Team' folder has been connected, then paste the prompt from your '02 - START HERE' file.
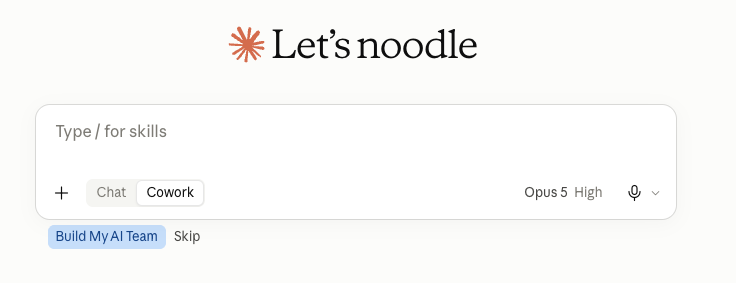
Fig 5Your folder is connected when 'Build My AI Team' shows under the message box. - Hit 'Enter' and your first session will start.
Good luck, enjoy and have fun building your AI team.
The update log
- 1 September 2026 - version 1 published.
Something not look right? Let us know here.